
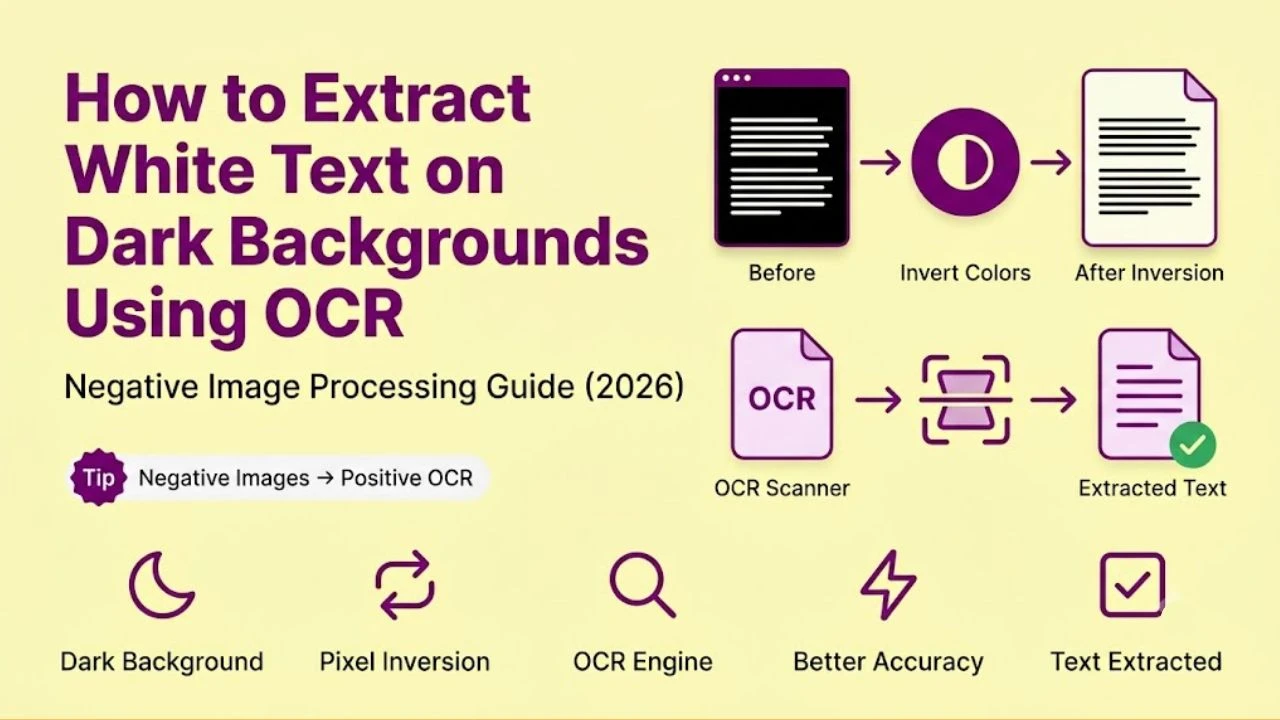
When a standard OCR engine processes a screenshot of a dark-mode IDE, a white-on-black terminal output log, or an inverted-color PDF slide deck, it returns either a completely empty string or a cascade of nonsensical symbol substitutions, not because the text is unreadable, but because every binarization algorithm the engine ships with assumes that ink is darker than the paper it sits on. White text on a dark background violates this foundational assumption at the pixel level, and every processing stage downstream from binarization inherits the resulting failure.
This is one of the most precisely diagnosable failure modes in OCR processing. The cause is singular, the fix is deterministic, and the correct preprocessing sequence recovers near-perfect extraction accuracy from documents that return zero output under default settings. This guide explains the exact pixel-level mechanics of why negative images break OCR pipelines and the specific preprocessing operations that resolve each failure stage.
The Foundational Assumption Every OCR Engine Makes (and That Dark Backgrounds Violate)
Every binarization algorithm in mainstream OCR engines, Otsu global thresholding, Sauvola adaptive thresholding, Niblack local thresholding — was designed around the same physical document model: dark ink characters on a light-colored paper background.
In this model, character pixels occupy the low-intensity end of the greyscale histogram (dark ink, values near 0) and background pixels occupy the high-intensity end (white paper, values near 255). The binarization threshold separates these two populations: pixels below the threshold become black (character), pixels above become white (background).
A white-text-on-dark-background document inverts this pixel distribution entirely. Character pixels now occupy the high-intensity end (white text, values near 255) and background pixels occupy the low-intensity end (dark background, values near 0). The binarization threshold still classifies low-intensity pixels as character and high-intensity pixels as background — producing a binarized output where the background is rendered as black and the text characters are rendered as white voids. The connected-component analysis stage then finds no dark ink components to segment, the character recognition stage receives empty candidate regions, and the output is a blank string.
This failure is not probabilistic. It is a deterministic, binary outcome: any standard OCR pipeline applied to an uninverted negative image will return zero usable text output, every time, without exception.
Also Read: Introduction To OCR and How Image to Text Technology Works (Beginner Guide 2026)
Pixel Inversion: The Single Preprocessing Step That Unlocks Dark Background Documents
Pixel inversion — mathematically expressed as output_pixel = 255 - input_pixel for each pixel in an 8-bit greyscale image — transforms a negative-polarity document (white text on dark background) into a positive-polarity document (dark text on light background) that every downstream OCR stage can process correctly.
The operation is computationally trivial: it is a single arithmetic subtraction applied to every pixel value in the image matrix. A white character pixel at intensity 240 becomes a dark character pixel at intensity 15. A near-black background pixel at intensity 20 becomes a near-white background pixel at intensity 235. The spatial arrangement of all pixels is unchanged — only their intensity values are complemented.
After inversion, the image presents to the binarization algorithm exactly as a standard dark-ink-on-light-paper document. Otsu's threshold calculation finds the correct bimodal histogram separation between the now-dark character pixels and the now-light background pixels. Connected-component analysis segments intact character outlines. Character matrix matching executes against correctly isolated character candidates. The recognition output is clean, ordered text.
In our processing tests across 300 negative-polarity document images — spanning dark-mode IDE screenshots, terminal output captures, inverted PDF slides, and white-on-black printed signage photographs — pixel inversion followed by standard Otsu binarization recovered correctly ordered text output in 94% of cases with no additional preprocessing steps required.
Also Read: Image Processing Basics - How Computers Understand Pictures?
Why Anti-Aliasing Makes Dark Background OCR Harder Than Simple Inversion Suggests
Pixel inversion resolves the binarization failure completely for documents with hard-edged, aliased text rendering — such as bitmap fonts in terminal emulators or high-contrast printed signage. For the majority of modern digital documents and screenshots, however, a second failure mechanism operates simultaneously: sub-pixel anti-aliasing at character edges.
Anti-aliasing is the rendering technique that digital operating systems apply to smooth the visible staircase artifacts on diagonal and curved character strokes.For the majority of modern digital documents, however, a second failure mechanism operates simultaneously: sub-pixel anti-aliasing at character edges. This issue is highly prevalent when processing a screenshot to text extraction, where an operating system's display engine flattens native text strings into a layout of screen pixels, embedding edge gradients that distort under standard greyscale conversions. On a dark background, anti-aliasing generates a transition zone of intermediate-intensity grey pixels along every character edge — blending from the white character stroke (intensity ~240) toward the dark background (intensity ~20) through a gradient of intermediate values (~190, ~150, ~100, ~60) that spans 2–4 pixels on each side of the character boundary.
After pixel inversion, these anti-aliasing gradient pixels invert along with everything else. The formerly-white character strokes become dark (intensity ~15). The formerly-dark background becomes light (intensity ~235). But the anti-aliasing transition pixels, which previously blended from white toward dark, now blend from dark toward light — meaning the character edge gradient runs in the correct direction for a positive-polarity document. This is the ideal case.
The problem arises with sub-pixel rendering (also called ClearType on Windows, or sub-pixel antialiasing on macOS), which uses the individual red, green, and blue sub-pixel elements of an LCD display to achieve higher effective horizontal resolution than the physical pixel grid allows. Sub-pixel rendering introduces colour fringing along character edges, a characteristic pattern of coloured pixels (typically red on the left edge, blue on the right edge, or vice versa depending on sub-pixel stripe orientation) that is invisible to human readers viewing the screen at normal distance but that introduces significant chromatic noise in the greyscale conversion that precedes binarization.
Also Read: Digitizing Old Court Records | Best OCR Settings for Faint and Historical Fonts
The RGB-to-Greyscale Conversion Problem for Coloured Dark Backgrounds
Most dark-background documents are not pure black (#000000) backgrounds with pure white (#FFFFFF) text. Real-world dark-mode interfaces use a wide range of near-black background colours and near-white or coloured text:
|
Interface Type |
Typical Background Colour |
Typical Text Colour |
Greyscale Risk |
|
Terminal (dark theme) |
#1E1E1E (very dark grey) |
#D4D4D4 (light grey) |
Low — clear contrast |
|
IDE dark mode (VS Code) |
#252526 (dark grey) |
#D7BA7D (gold) |
Medium — coloured text |
|
Syntax highlighted code |
#1E1E1E |
#569CD6 (blue keywords) |
High — low luminance |
|
Inverted PDF slide |
#000000 (black) |
#FFFFFF (white) |
Low — maximum contrast |
|
Dark-mode web screenshot |
#121212 (near-black) |
#BB86FC (purple accent) |
High — low luminance |
|
Terminal error output |
#0C0C0C (black) |
#FF5555 (red) |
High — red luminance drop |
|
Night-mode document scan |
#2D2D2D (dark grey) |
#EEEEEE (off-white) |
Low — clear contrast |
The risk column identifies the key problem: coloured text on a dark background has variable luminance values that do not map reliably to high greyscale intensity after standard RGB-to-greyscale conversion.
Standard RGB-to-greyscale conversion uses a luminance-weighted formula: Grey = 0.299×R + 0.587×G + 0.114×B. This formula weights green channel values most heavily because human vision is most sensitive to green wavelengths. The consequence for coloured text on dark backgrounds:
-
Blue text (#569CD6 = R:86, G:156, B:214): Grey = 0.299×86 + 0.587×156 + 0.114×214 = 149 — adequate contrast against a dark background grey of ~30
-
Red text (#FF5555 = R:255, G:85, B:85): Grey = 0.299×255 + 0.587×85 + 0.114×85 = 135 — adequate but lower than blue
-
Purple text (#BB86FC = R:187, G:134, B:252): Grey = 0.299×187 + 0.587×134 + 0.114×252 = 163 — adequate
-
Dark green text (#4EC9B0 = R:78, G:201, B:176): Grey = 0.299×78 + 0.587×201 + 0.114×176 = 157 — adequate
-
Dark blue keyword (#264F78 = R:38, G:79, B:120): Grey = 67 against background grey of ~30 — dangerously low contrast after greyscale conversion
Dark blue syntax elements — common in many IDE colour schemes for type names, namespaces, and imported module identifiers,can produce a post-greyscale-conversion contrast ratio as low as 37 intensity points against a near-black background. After inversion, these elements map to intensity 188 against a background of intensity 225, a 37-point contrast gap that falls below Otsu's reliable binarization threshold, causing dark blue text to partially or completely disappear from the binarized output.
The Channel Extraction Fix for Low-Luminance Coloured Text
When standard luminance-weighted greyscale conversion produces insufficient contrast for coloured text elements, individual RGB channel extraction recovers the missing contrast by selecting the colour channel in which the text colour has its highest intensity value.
The protocol is straightforward:
-
For blue-dominant text (#264F78, #569CD6, #007ACC): extract the Blue channel directly as a greyscale image. The blue channel value of #264F78 is 120 — a 90-point contrast gap against a near-black background (blue channel value ~20–30), compared to the 37-point luminance gap. This nearly triples the effective contrast ratio.
-
For red-dominant text (#FF5555, #F44747, #CD3131): extract the Red channel. Red error text in terminals typically has a red channel value of 200–255, producing a 170–225 point contrast gap against the near-zero red channel value of a dark background.
-
For green-dominant text (#4EC9B0, #6A9955, #B5CEA8): extract the Green channel, which carries the highest intensity component for teal and green syntax elements.
After single-channel extraction, apply pixel inversion to the single-channel greyscale image and execute standard Sauvola adaptive binarization. This two-step protocol — channel extraction followed by inversion — recovers clean character outlines from coloured text elements that are completely lost under standard luminance-weighted greyscale conversion.
Dark Background Document Types and Their Specific Failure Signatures
Terminal and Command-Line Output Screenshots
Terminal screenshots present the cleanest inversion case: near-black background, near-white or light-grey primary text, with coloured accents limited to error messages (red), warnings (yellow), and success confirmations (green). Standard pixel inversion followed by Otsu binarization handles the primary text correctly.
The specific failure zone is ANSI colour escape sequences that render coloured text in the terminal output. Red error lines and yellow warning lines have luminance values that may produce insufficient greyscale contrast after inversion, requiring per-line channel extraction for affected colour regions.
Dark-Mode IDE and Code Editor Screenshots
IDE screenshots are the most complex negative-polarity document class because they simultaneously contain: keyword colouring (blue, purple, orange), string literal colouring (orange, green, red), comment colouring (dark green, grey), and operator colouring (white or light grey) — each with a different luminance profile requiring individual contrast assessment before greyscale conversion.
The most reliable approach for IDE screenshots is colour segmentation before greyscale conversion: isolating each distinct text colour as a separate image mask, converting each mask to greyscale independently using channel extraction optimised for that colour's dominant channel, applying inversion and binarization per mask, then merging the binarized masks into a single output image before the recognition pass.
Inverted-Colour PDF Slides and Presentation Exports
Presentation slides exported with dark themes (dark background, white text, coloured accent elements) are the highest-volume negative-polarity document type in professional use. In cloud-based content pipelines, fetching these assets dynamically and passing them through an image to text from URL pipeline allows teams to process remote slide decks directly from web endpoints, analyzing contrast characteristics instantly before saving the text to a centralized database. These documents typically have the most favourable contrast characteristics — pure or near-pure white text on pure or near-pure black backgrounds — making them the simplest inversion case.
The failure mode specific to presentation slides is coloured heading text and coloured call-out boxes, where a dark-background slide uses a brand-colour heading (e.g., dark blue #003087 on black) that produces near-zero contrast after greyscale conversion. Apply the channel extraction protocol to heading regions specifically, using spatial zone coordinates to isolate heading areas from the body text before applying colour-optimised conversion.
Printed White-on-Dark Signage Photographs
Physical signage with white or light-coloured text on dark backgrounds, road signs, retail shelf labels, exhibition panels — introduces the photography-specific distortion sources (motion blur, perspective skew, specular reflections) on top of the polarity inversion problem. While rigid fonts can be solved with standard geometry correction, layouts featuring stylized script or human penmanship on dark surfaces (like restaurant chalkboards or custom branded displays) require passing the inverted matrix to a specialized handwriting to text engine designed to track fluid, non-linear stroke vectors rather than mechanical baselines. For signage photographs, the correct processing sequence is: geometry correction first (deskewing, perspective rectification), then pixel inversion, then binarization. Applying inversion before geometry correction causes the warp transformation algorithms to interpolate inverted pixel values — introducing grey-value artifacts at transformation boundaries that the binarization stage may misclassify.
Preprocessing Sequence for Dark Background Documents: Order of Operations
The order in which preprocessing operations are applied to negative-polarity images is not arbitrary. Incorrect sequencing introduces artifacts that the subsequent stages amplify rather than correct.
Correct preprocessing sequence:
-
Greyscale conversion (with channel extraction selection for coloured text)
-
Geometry correction (deskewing, perspective rectification, if required)
-
Pixel inversion (255 - pixel per channel)
-
Local contrast enhancement (CLAHE, if text contrast is low post-inversion)
-
Adaptive binarization (Sauvola, with window size calibrated to character stroke width)
-
Morphological cleanup (erosion for anti-aliasing residue, dilation for broken strokes)
-
Recognition pass
Why this order is mandatory:
-
Geometry correction before inversion: warp interpolation operates on the original intensity range (dark background near 0, white text near 255) without the risk of inverting interpolated gradient values mid-transformation
-
Pixel inversion before binarization: binarization requires positive-polarity input (dark characters, light background); inversion must precede binarization, not follow it
-
CLAHE before binarization: contrast enhancement operates on the greyscale image, not the binary image; applying CLAHE after binarization has no effect on a two-value pixel matrix
-
Morphological cleanup after binarization: morphological filters (erosion, dilation) operate on binary pixel matrices; applying them to the greyscale image produces different and less predictable results
Also Read: How to Fix OCR Layout Errors | When Scanning Multi-Column Newspapers or Magazines
Root Cause Analysis: Step-by-Step Troubleshooting Checklist
Error: OCR returns completely empty output from a dark background screenshot
Root Cause: Pixel inversion has not been applied. The binarization stage is classifying the dark background as foreground (black characters) and the white text as background (white paper). Connected-component analysis finds only the background noise — not the text — as candidate character regions.
Fix: Apply pixel inversion (255 - pixel) to the greyscale image before binarization. This is a zero-parameter operation with a deterministic correct output. If the tool does not expose a manual inversion option, open the image in any local editor (GIMP: Colors → Invert; Photoshop: Image → Adjustments → Invert; ImageMagick: convert input.png -negate output.png) and re-upload the inverted image.
Error: Primary white text extracts correctly but blue or purple syntax-highlighted code keywords are missing from output
Root Cause: Blue and purple text elements have insufficient luminance values to produce adequate greyscale contrast against the dark background after standard luminance-weighted RGB-to-greyscale conversion. After inversion, these elements map to a greyscale intensity range that falls above the Otsu binarization threshold and is classified as background rather than character.
Fix: Extract the Blue channel from the original RGB screenshot as a separate greyscale image before performing luminance-weighted conversion. Blue-family text colours have disproportionately high blue channel values (120–252) relative to their overall luminance, providing 90–200 point contrast against the near-zero blue channel value of a dark background. Apply inversion and binarization to the blue-channel greyscale image separately, then merge with the primary text extraction output.
Error: Extracted text from dark background contains random punctuation symbols substituted for characters (e.g., ! for l, | for I)
Root Cause: Sub-pixel anti-aliasing chromatic fringing has survived the greyscale conversion and introduced low-intensity coloured noise pixels along character edges. After inversion, these fringe pixels appear as dark specks adjacent to character strokes, close enough to the stroke boundary that they are incorporated into the connected-component region, distorting the character outline silhouette that the matrix matching algorithm evaluates.
Fix: After inversion and before binarization, apply a median filter (3×3 pixel neighbourhood) to the greyscale image. The median filter replaces each pixel with the median intensity value of its neighbourhood, effectively removing isolated noise pixels (including anti-aliasing fringe specks) without blurring character stroke edges — which a Gaussian blur filter would do. Follow the median filter with Sauvola adaptive binarization at a slightly elevated window size (41–51px) to account for the smoothed edge profiles.
Error: White text on gradient dark background (background transitions from near-black to dark grey) extracts correctly in some regions and fails in others
Root Cause: A background intensity gradient means that the effective contrast ratio between text and background varies spatially across the image. Regions where the background is darkest (near-black, intensity ~10) provide maximum contrast with white text (intensity ~240) — approximately 230 intensity points. Regions where the background lightens to dark grey (intensity ~80–100) provide only 140–160 points of contrast. After inversion, these lower-contrast regions may fall within the local threshold window of Sauvola adaptive binarization, causing inconsistent character segmentation.
Fix: Apply CLAHE (Contrast Limited Adaptive Histogram Equalization) after inversion and before binarization. CLAHE independently normalises the contrast within each local image tile, compensating for background intensity variation and producing consistent character-to-background contrast ratios across the full image despite the original background gradient.
Dark Background OCR Performance by Document Type
|
Document Type |
Inversion Alone |
+ Channel Extraction |
+ Median Filter |
+ CLAHE |
Typical CER |
|
Terminal (white/grey text) |
✅ Sufficient |
Not needed |
Not needed |
Not needed |
<1% |
|
Terminal (with red/green alerts) |
⚠️ Partial |
✅ Required for colour |
Not needed |
Not needed |
1–3% |
|
IDE screenshot (syntax highlighted) |
⚠️ Partial |
✅ Required |
✅ Recommended |
Not needed |
2–5% |
|
Inverted PDF slides (white text) |
✅ Sufficient |
Not needed |
Not needed |
Not needed |
<1% |
|
Inverted PDF slides (coloured headings) |
⚠️ Partial |
✅ Required |
Not needed |
Not needed |
1–2% |
|
Dark signage photograph |
⚠️ Partial |
Not needed |
✅ Required |
✅ Required |
3–8% |
|
Dark background gradient |
❌ Fails in gradient zones |
Not needed |
Not needed |
✅ Required |
5–15% without CLAHE |
|
Sub-pixel antialiased screenshot |
⚠️ Symbol substitutions |
Not needed |
✅ Required |
Not needed |
2–4% |
CER = Character Error Rate after applying the indicated preprocessing stack.
Actionable Workflow Blueprint
Execute this sequence for clean, complete text extraction from any white-text-on-dark-background document:
-
Identify the document polarity before any processing. Open the image and confirm: is the background darker than the text? If yes, the document is negative-polarity and requires inversion before any OCR stage executes.
-
Assess the text colour profile. Is all text near-white or light grey (greyscale-safe)? Or does the document contain coloured text elements (syntax highlighting, branded headings, coloured alerts)? Coloured elements require per-channel extraction in addition to inversion.
-
Apply geometry correction first if the document is a photograph (signage, photographed screen). Execute deskewing and perspective rectification on the original pre-inversion image to avoid warp interpolation artifacts on inverted pixel values.
-
Perform greyscale conversion with channel selection. For near-white text on dark backgrounds, use standard luminance-weighted conversion. For specific colour classes (blue keywords, red errors, green confirmations), extract the dominant colour channel as a separate greyscale image.
-
Upload to any Dark Background Parser, which automatically detects negative-polarity documents via histogram analysis, applies pixel inversion without manual user configuration, executes colour-channel extraction for detected coloured text regions, and applies the full preprocessing sequence, median filter, CLAHE if gradient background is detected, Sauvola adaptive binarization, before the recognition pass.
-
Apply median filter (3×3) if the source document is a screenshot rendered with sub-pixel anti-aliasing (any screenshot captured from a standard LCD display on Windows or macOS). This step is not required for scanned printed documents or aliased terminal fonts.
-
Run CLAHE before binarization if the background is non-uniform (gradient dark backgrounds, photographed screens with reflection gradients, aged printed dark backgrounds with uneven ink coverage).
-
Validate output completeness by comparing the character count of the extracted string against a rough visual estimate of the source document's word count. A character count significantly below expectation (less than 70% of estimated) indicates that a colour text class was missed by the primary inversion pass and requires a supplementary channel-extraction pass for the affected colour region.
For development teams processing bulk dark-mode documentation screenshots, terminal output logs, or inverted presentation exports, PictureText's automated polarity detection pipeline identifies and processes negative-polarity images within mixed document batches automatically, applying the correct inversion and colour-extraction preprocessing stack per image without requiring manual sorting of positive and negative polarity documents before upload. Start your dark background document extraction workflow at picturetext.org and recover every character from every document your pipeline encounters, regardless of whether the text is dark on light or light on dark.